20 DIY At Home Nail Ideas For Spring 2020
- Bailey Renee

- Apr 8, 2020
- 4 min read
Obviously, you can't get enough of these trends...

Nude Blossoms

Use the cherry tree method. (Explained further down).
Negative Space with Gold Leaf

Use the gold foil method. (Explained further down).
The Half Moon Mani

Apply a nude base or a base coat. Wait until fully dry, then add a quick-dry topcoat if using a base. It must be quick-dry. Then using a piece of tape cut a half-circle shape, and apply it to the nail at the cuticle. Fill in the half-circle with blue polish, and peel up the tape immediately. Clean up the shape, and add a glossy or matte topcoat.
Simple Dotting Tool (or toothpick) Flowers

Using a dotting tool or a toothpick apply five small dots creating a flower. Vary the colors and flower sizes.
Florals

Use a cheap makeup sponge to create the gradient. Apply two different colors next to each other on the sponge, and dab on nails. Clean up the edges. Using a toothpick make the branches using a brown polish. Make the leaves using green, and add two different shades of pink for the flowers.
Simple Accent Nails

Paint one nail white, and use the diluting method (with isopropyl alcohol and a Sharpie) to create the marbled pattern. (Used and explained in "Watercolor Flowers" design). Use striping tape or polish to apply the stripe.
Multicolored Pastel Mani

Paint different colors of pastel polish on each nail.
Classy Silver and Gold Nails

Using two different striping tapes, tape one color down the middle. Apply the same tape in a "V" shape reflecting across the midline. Directly above the lines, apply the other color in the same pattern. Leave a space, and repeat until you reach the edge of your nail. For an alternative, follow the same steps using two different polishes.
Gold Leaf on Dark Purple

Use gold foil in place of gold leaf. (How to is further down).
Abstract Mani

Using multiple solid colored polishes paint random shapes and lines across the nail using a long brush and the polish's brush.
Minimalist

Using a piece of striping tape, lay it horizontally and flat in the middle of the nail. For an alternative, paint a stripe of color using a striping brush horizontally across the nail.
Cherry Blossoms

After applying a base use a black or brown polish as well as a toothpick. Carefully make bumpy thin lines with some lines bisecting off each other to create an irregular branch pattern. Using the other end of the toothpick and a pink polish apply three pink dots on the branches to create flowers.
Gold Leaf Gradient

Replace gold leaf with gold foil. (How to is further down).
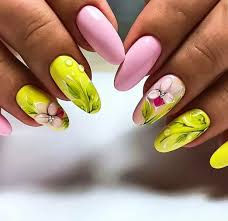
Watercolor Flowers

Apply a green sharpie to a plastic surface you don't care about (such as a lid). Dilute the Sharpie using Isopropyl Alcohol. For this design use a clean, squared-off brush (such as an eyeliner brush). Carefully paint on the leaves, and do the same with a pink Sharpie. Carefully painting the flowers. Be sure to test your topcoat to be sure it won't dull the colors.
Abstract Shapes

Start by applying a white base. If you don't have a good white nail polish use acrylic paint or white-out. I highly recommend using Color Club's French Tip polish. Use your creativity, and create shapes on your nails using either a toothpick, a dead pen, or a brush.
Sparkly Pink Nails

'Cause you can't go wrong with pink. Apply a pink base to four nails and a nude base to one nail. On the nail with a nude base, use a cheap makeup sponge and apply a stroke of the nude base as well as the pink base to the sponge. Dab it on your nail to create a gradient. Clean up around the edges. Apply a dispersed glitter topper. Moving on to the next nail. Using a brush or a toothpick paint a line around the cuticle of the nail with the glitter gradient. Using a chunky glitter polish, paint it on the nail concentrating the glitter at the cuticle, and not letting the brush touch the tip of the nail. Moving on to the final design. Using a striping brush paint on the design. Obviously, this design requires skill, so you might want to practice on a sheet of construction paper, or you can paint a different design. Use your creativity on this one!
Abstract Crystal Nails

Apply a nude base, and then using any color apply a diagonal stroke of polish across the tip of the nail. Apply a matte top coat first. Then draw the crystals using a Sharpie! Make sure to let polish dry in between steps!
Gold Leaf Cuticles

Instead of using gold leaf use gold chrome foil. Paint the base color, and add eyelash glue to the tip of the nail. There's this weird wrapping paper foil that you can get at a craft store or even the dollar store that will stick to your nails with eyelash glue. Apply the foil ugly side down to the lash glue after it has dried. Peel up the foil and it should've transferred over to the eyelash glue. Repeat sticking the foil on places the glue didn't pick up the foil. Finish with a water-based topcoat (or I use unt peelable basecoat), followed by a regular top coat.
Trendy Butterfly Nails

Paint the shape of the butterfly, with the color you want, first. Then add the details with a Sharpie!
Matte Dainty Flowers

You can easily do this at home by applying a matte topcoat. Wait for it to fully dry; then draw on the flowers using a fine tip Sharpie!
That's it for 20 DIY At Home Nail Ideas For Spring 2020! I do hope you enjoyed. As always the photo creds go to the owners. I'm just here to provide you with some ideas I really like. 😊
To see some nail art I actually did check out my Instagram (@gloomy.nails), and to see more posts like this click the link here.
Have a colorful day! 🌈


Comments